
Step 1: Register on the Tap2Pay website
To activate your test account, click on the link in the top menu Activate and fill production request with the information about your company, click Save. After that our manager will contact you.
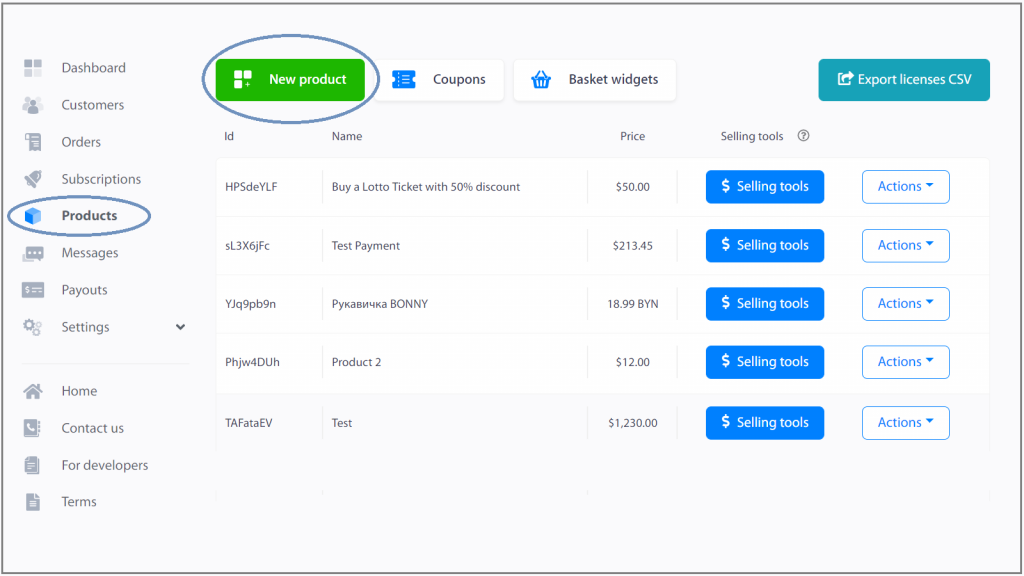
Step 2: Create the product
1.Select Products Tab, + New Product.
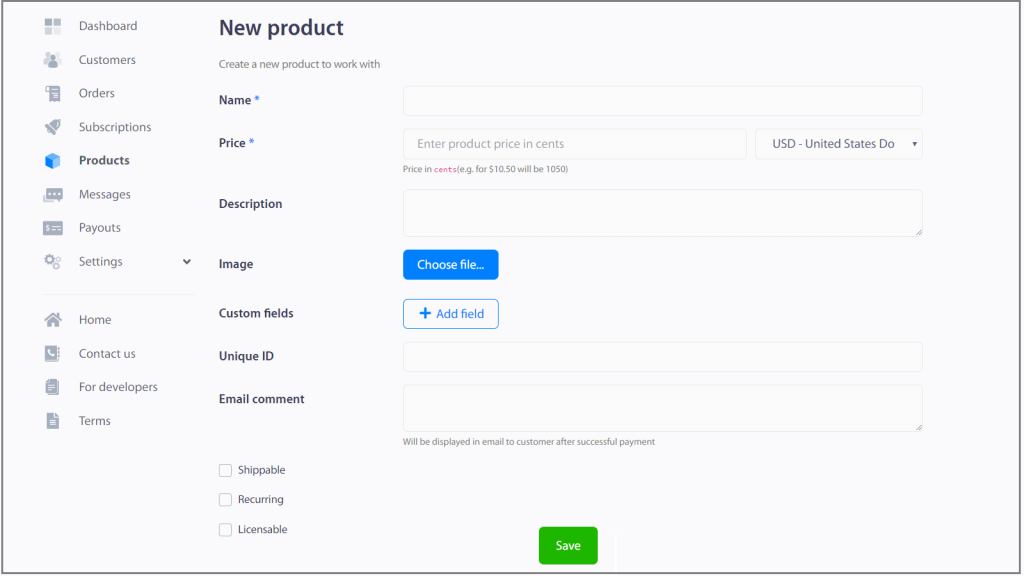
2.Fill in the form with the product description:
Name of Product, Price, Description of product or services, download Image of product.
Add Custom field, if you want customizable Checkout Popup. Tap2Pay requires only an e-mail. You can request a wide variety of customer information: name, phone number etc.
Select Shippable, if you provide delivery for your products.
Select Recurring, if you want to activate subscriptions and recurring payments. More information by the link.
Select Licensable, if you want receive order confirmation email after payment, event ticket etc.
Сlick Save.
The created product will be on the dashboard with the products list.
3.Next to each product on the list, you will see the Selling Tools button.
Step 3: Integration
After pressing the button you will see the window with different tabs Links, Website, QR, FB Ads:
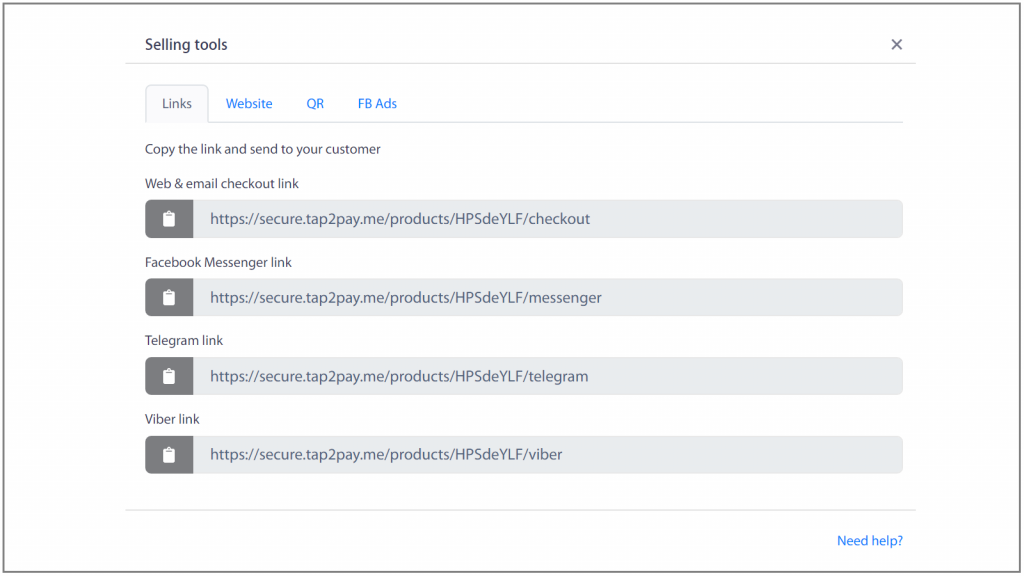
Links:
1.Web & email checkout link for integration with a social media post or e-mail, blog post etc.
2-4. FB, Telegram, and Viber link for integration with messengers.
Website:
You will see JS code for integration with a website like this:
<script src=’https://secure.tap2pay.me/checkout.v1.js‘></script>
<script>
var t2pHandler = new T2P.Checkout({merchant_id: “JzFXXr”});
</script>
<button type=”button” onClick=”t2pHandler.openProduct(‘M2QihwUT’)”>Buy</button>
Insert the code on a website.
You can see below link to API: “For more information about integration see documentation”.
QR:
The QR code for offline sales. (For example, it can be printed on a brochure or menu, etc., a person will have to scan it, automatically receive an invoice for payment in the instant messenger and pay with a card).
FB Ads:
Check please, a demo video, how Tap2Pay integrates with FB ads.
Coupons
To create a coupon, click Coupons on the top bar, click New coupon.
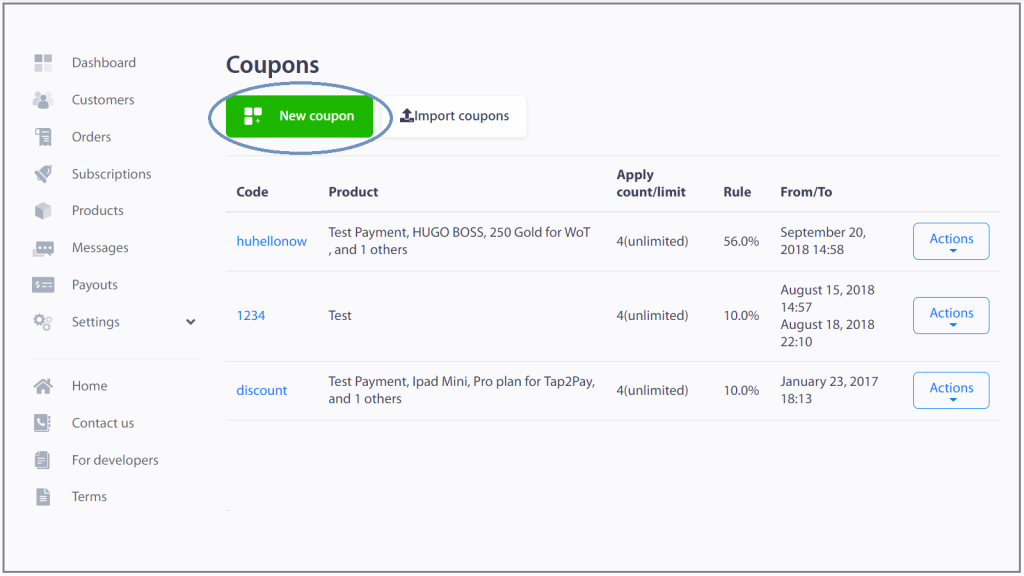
Fill the fields with information, select products for the coupon from the drop-down list and click Save.

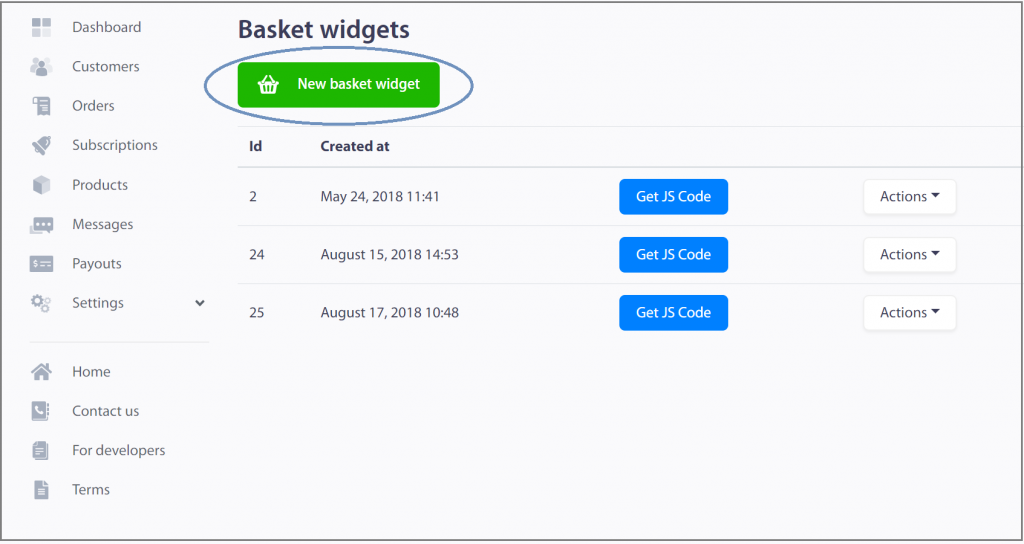
Basket Widget
To create a Basket Widget go to the Products tab, select a basket icon Basket Widgets, New Basket Widget.
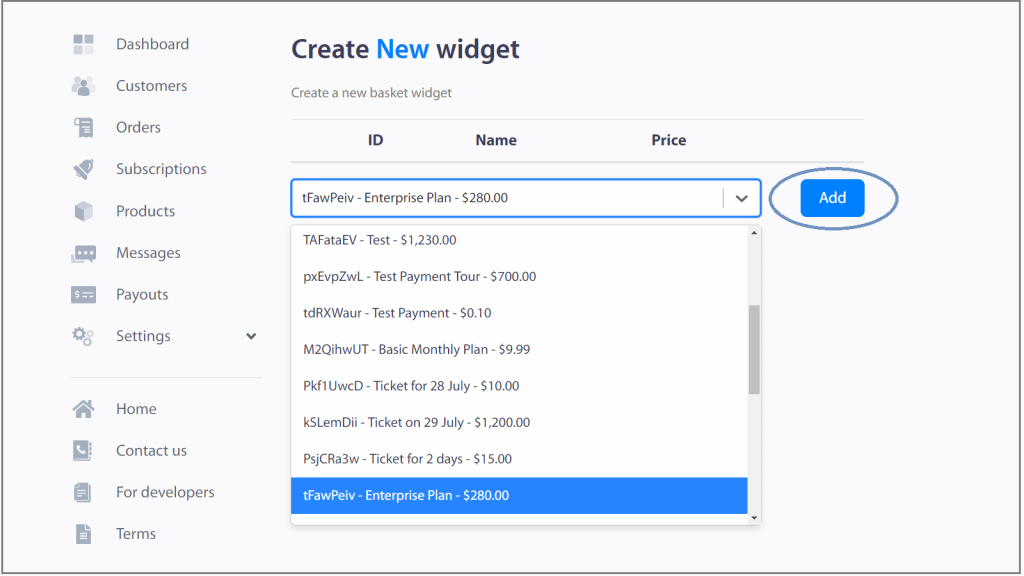
Select products for the widget from the drop-down list and click Add, after that click Save.
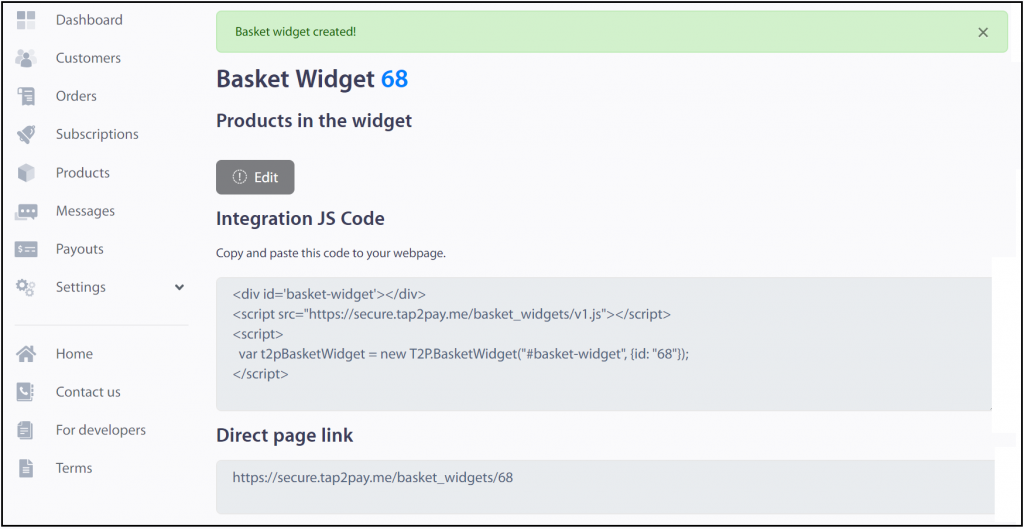
You will see the code like this, copy, and past it on your website.
As a result, you get a widget which looks like this:

Step 4: Test it
After the “Pay” button is installed on a website, click it and you will see a widget:
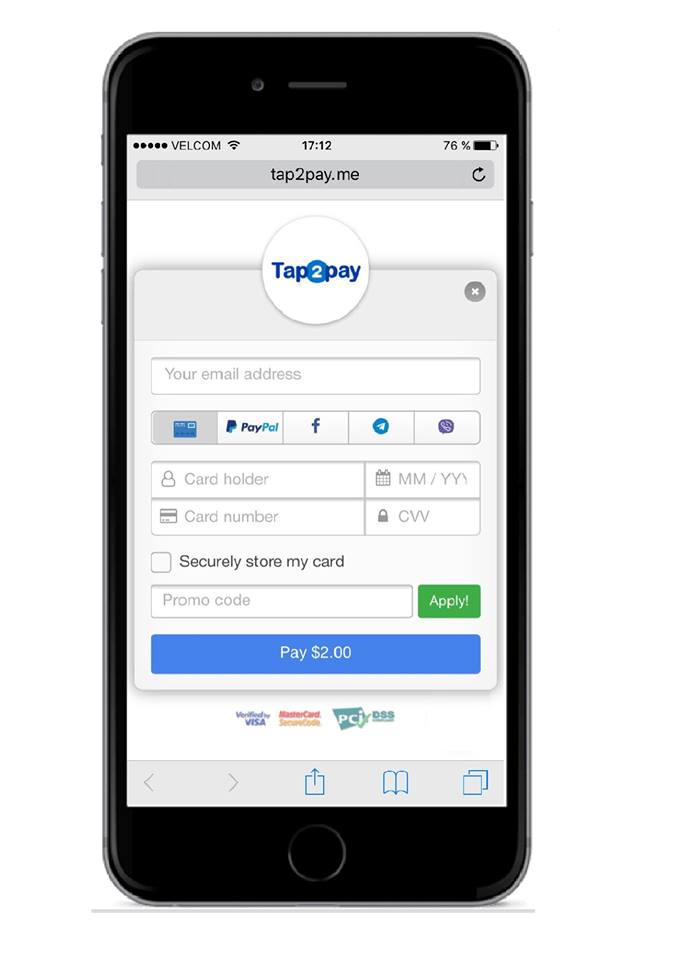
Fill in the test card details:
Card number: 4111 1111 1111 1111, CVV 111, validity: 11/23,
Card holder’s name: Ivan Ivanov, Email: your email.
If you need help, write on our email: anna@tap2pay.me.
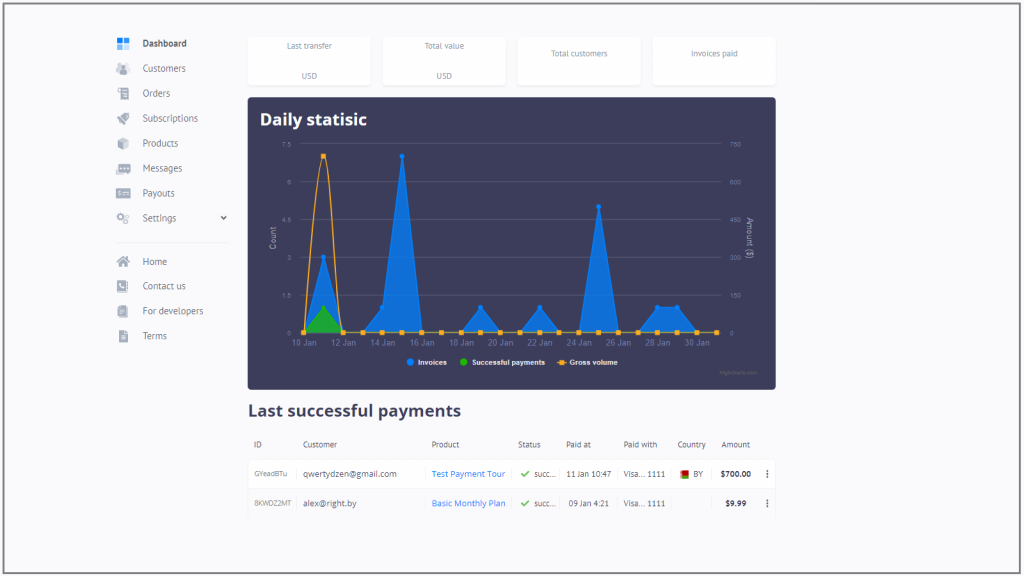
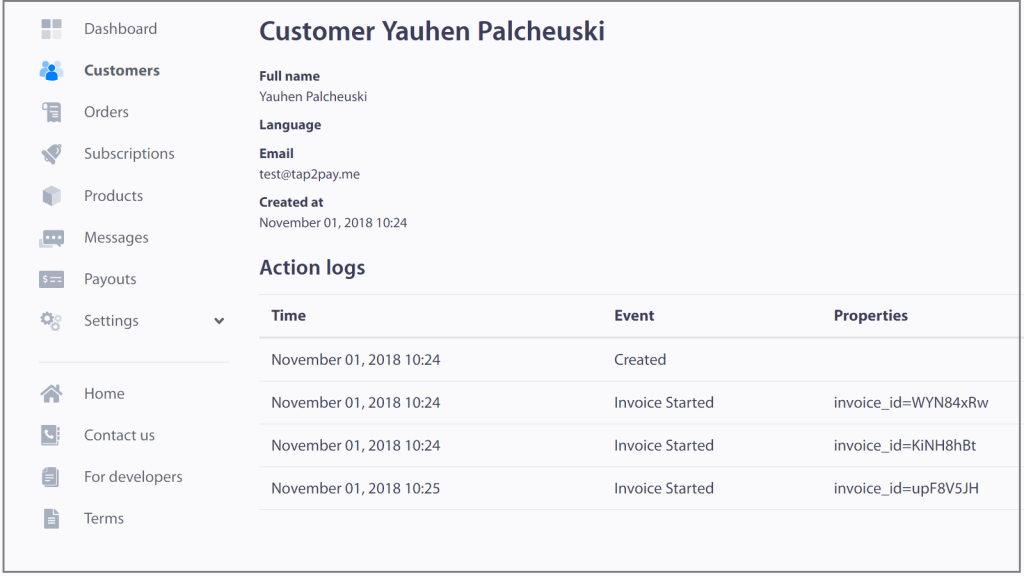
Step 5: Analyze your sales
On your merchant account you can see:
- The statistics dashboard, the total amount of transactions, etc.
- The customers’ information window.
- The orders information window. Select the Orders Tab.
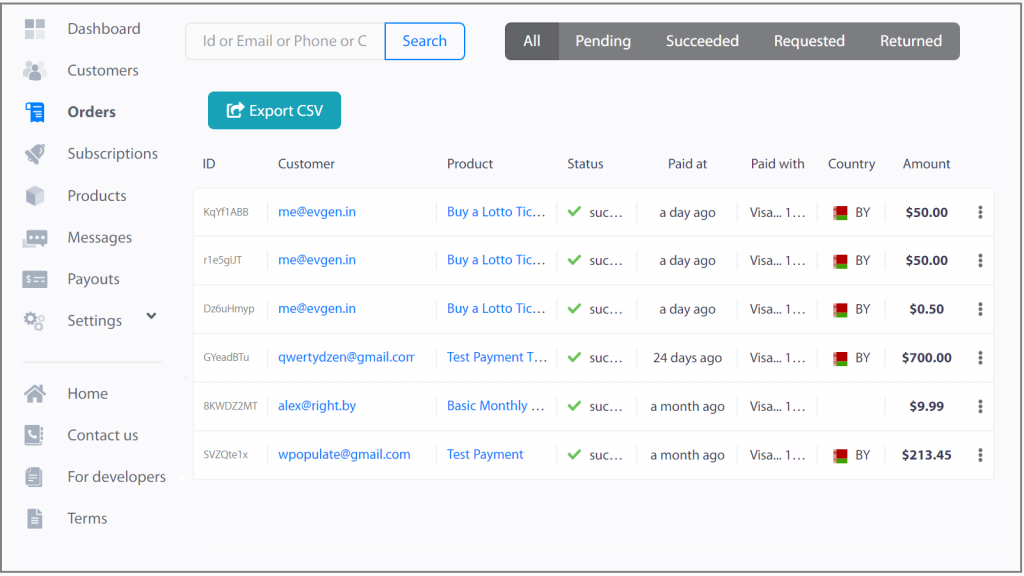
You can make a refund. To do this, click on the Return button. Check the refund amount or change it, specify the reason and click Return.

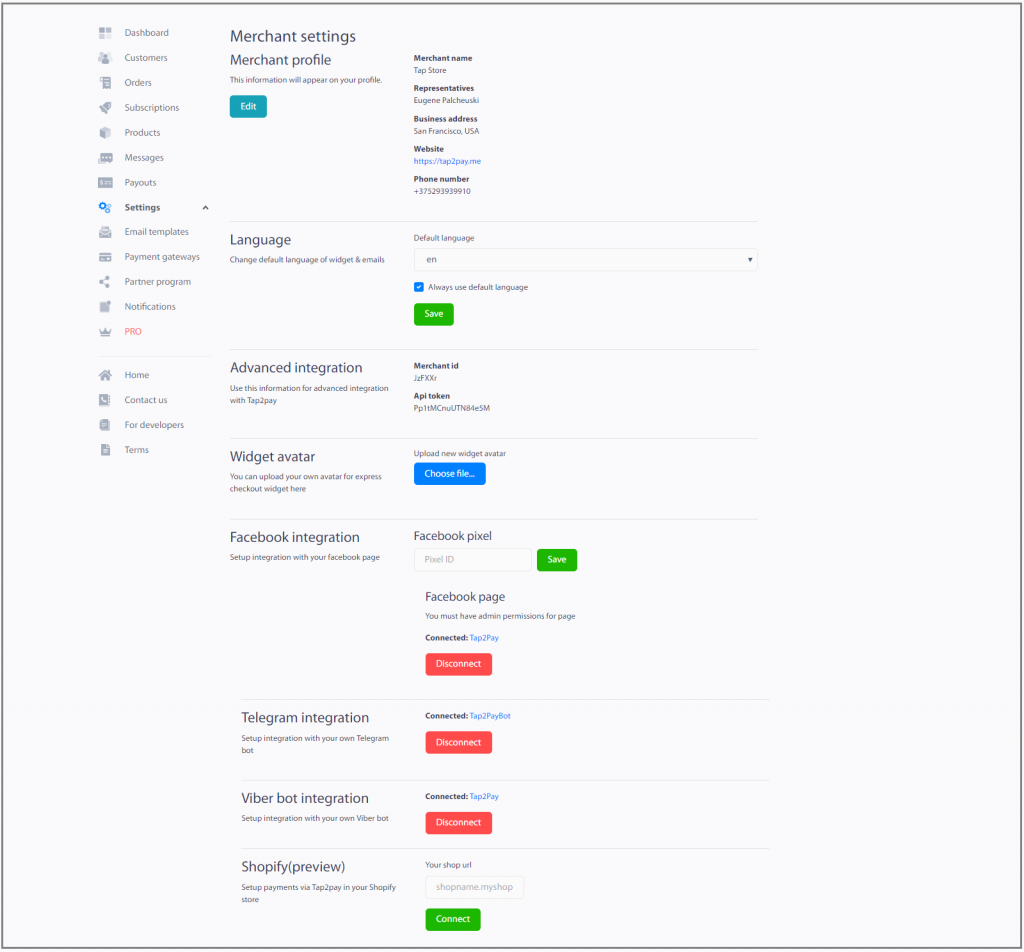
Settings
In the Settings tab, you should fill in the company details. To do this, in the Merchant profile field, click Edit. You can change the language settings in the Language field.
Add e-mail templates. Go to the Email templates tab, +Add email template.
Activate Payment Gateway. Go to Payments Gateways Tab, select gateway: Add Bluesnap, Add PayPal, Add Stripe, Add Braintree, Add Belgazprombank, Add BePaid, Add CreditGuard, Add Сash payments (when your customer can place an order via Tap2Pay and pay after delivery cash or by card). More information about Payment Gateways by the link.
Go to the Notifications tab select “Send emails to buyers about succeeded payments” to client receive an order confirmation or event ticket by mail.
Set up integration with chatbots, Facebook Pixel (available in a Pro Plan), with your Shopify.
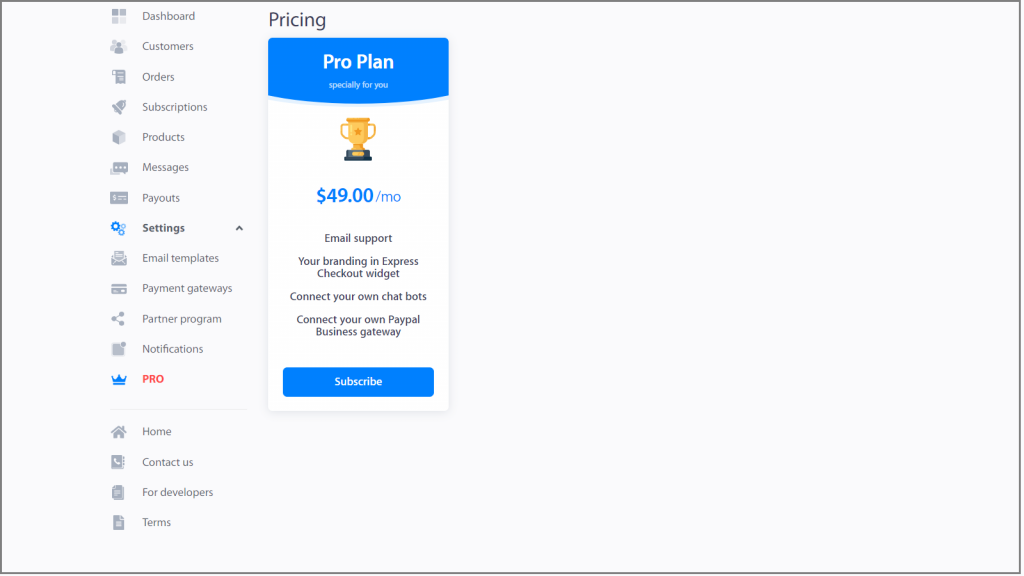
Pro Plan
Pro Plan includes:
- Email support
- Your branding in Express Checkout widget
- Connect your own chatbots
- Connect your own Paypal Business gateway
How to activate:
Go to PRO Tab, press Subscribe button.
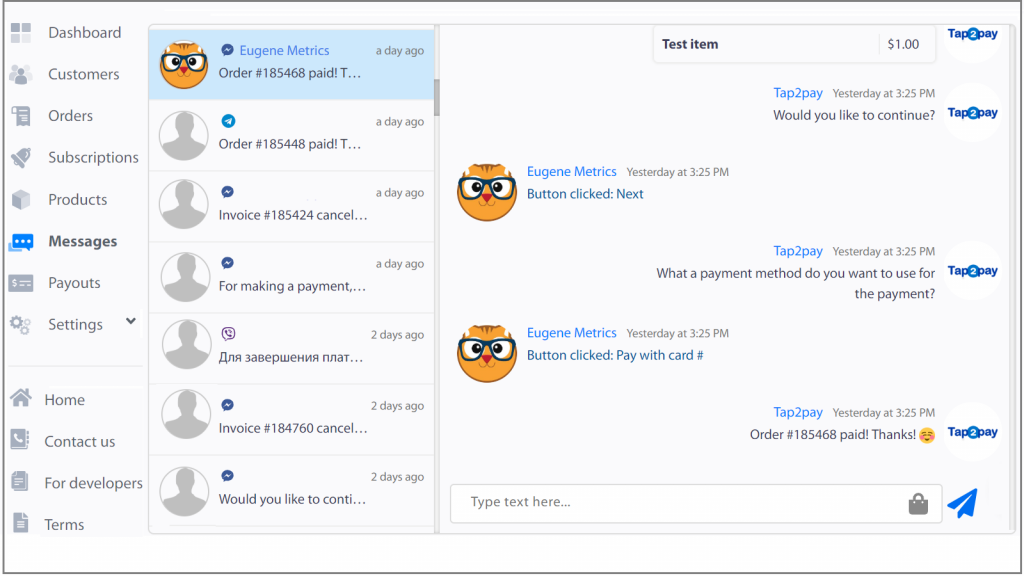
- The chat window with all your customers is available in the Pro Plan. You can support, communicate, send them notifications in real-time.
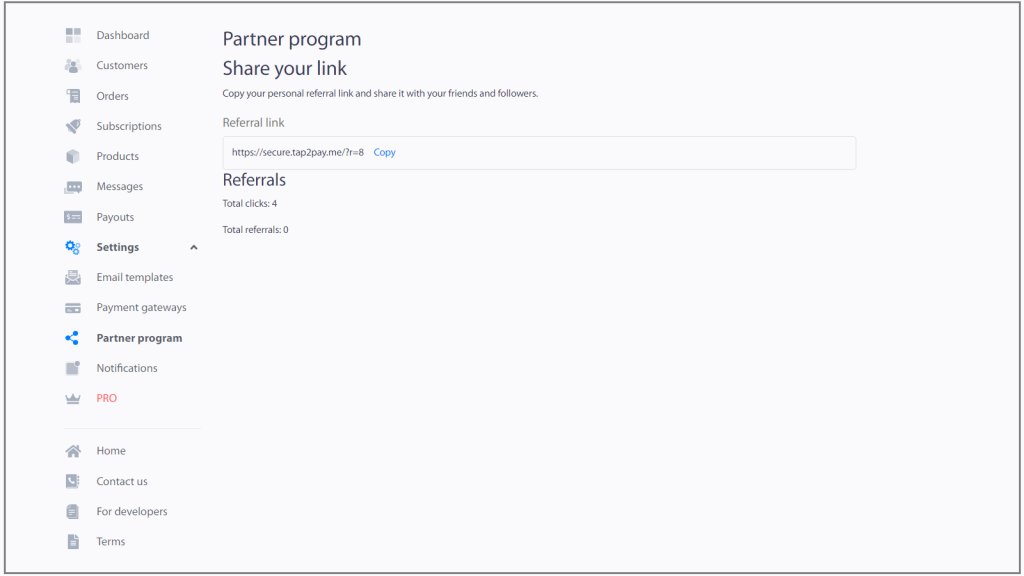
Partner program
If you want to earn with Tap2Pay select Partner Program Tab, copy the link and send it to a friend. When your friend registers with the link, we will transfer to your account 10% of our monthly commission earned from this client.
Happy selling!
Leave a Reply
You must be logged in to post a comment.